
Overview
What is Report Builder?
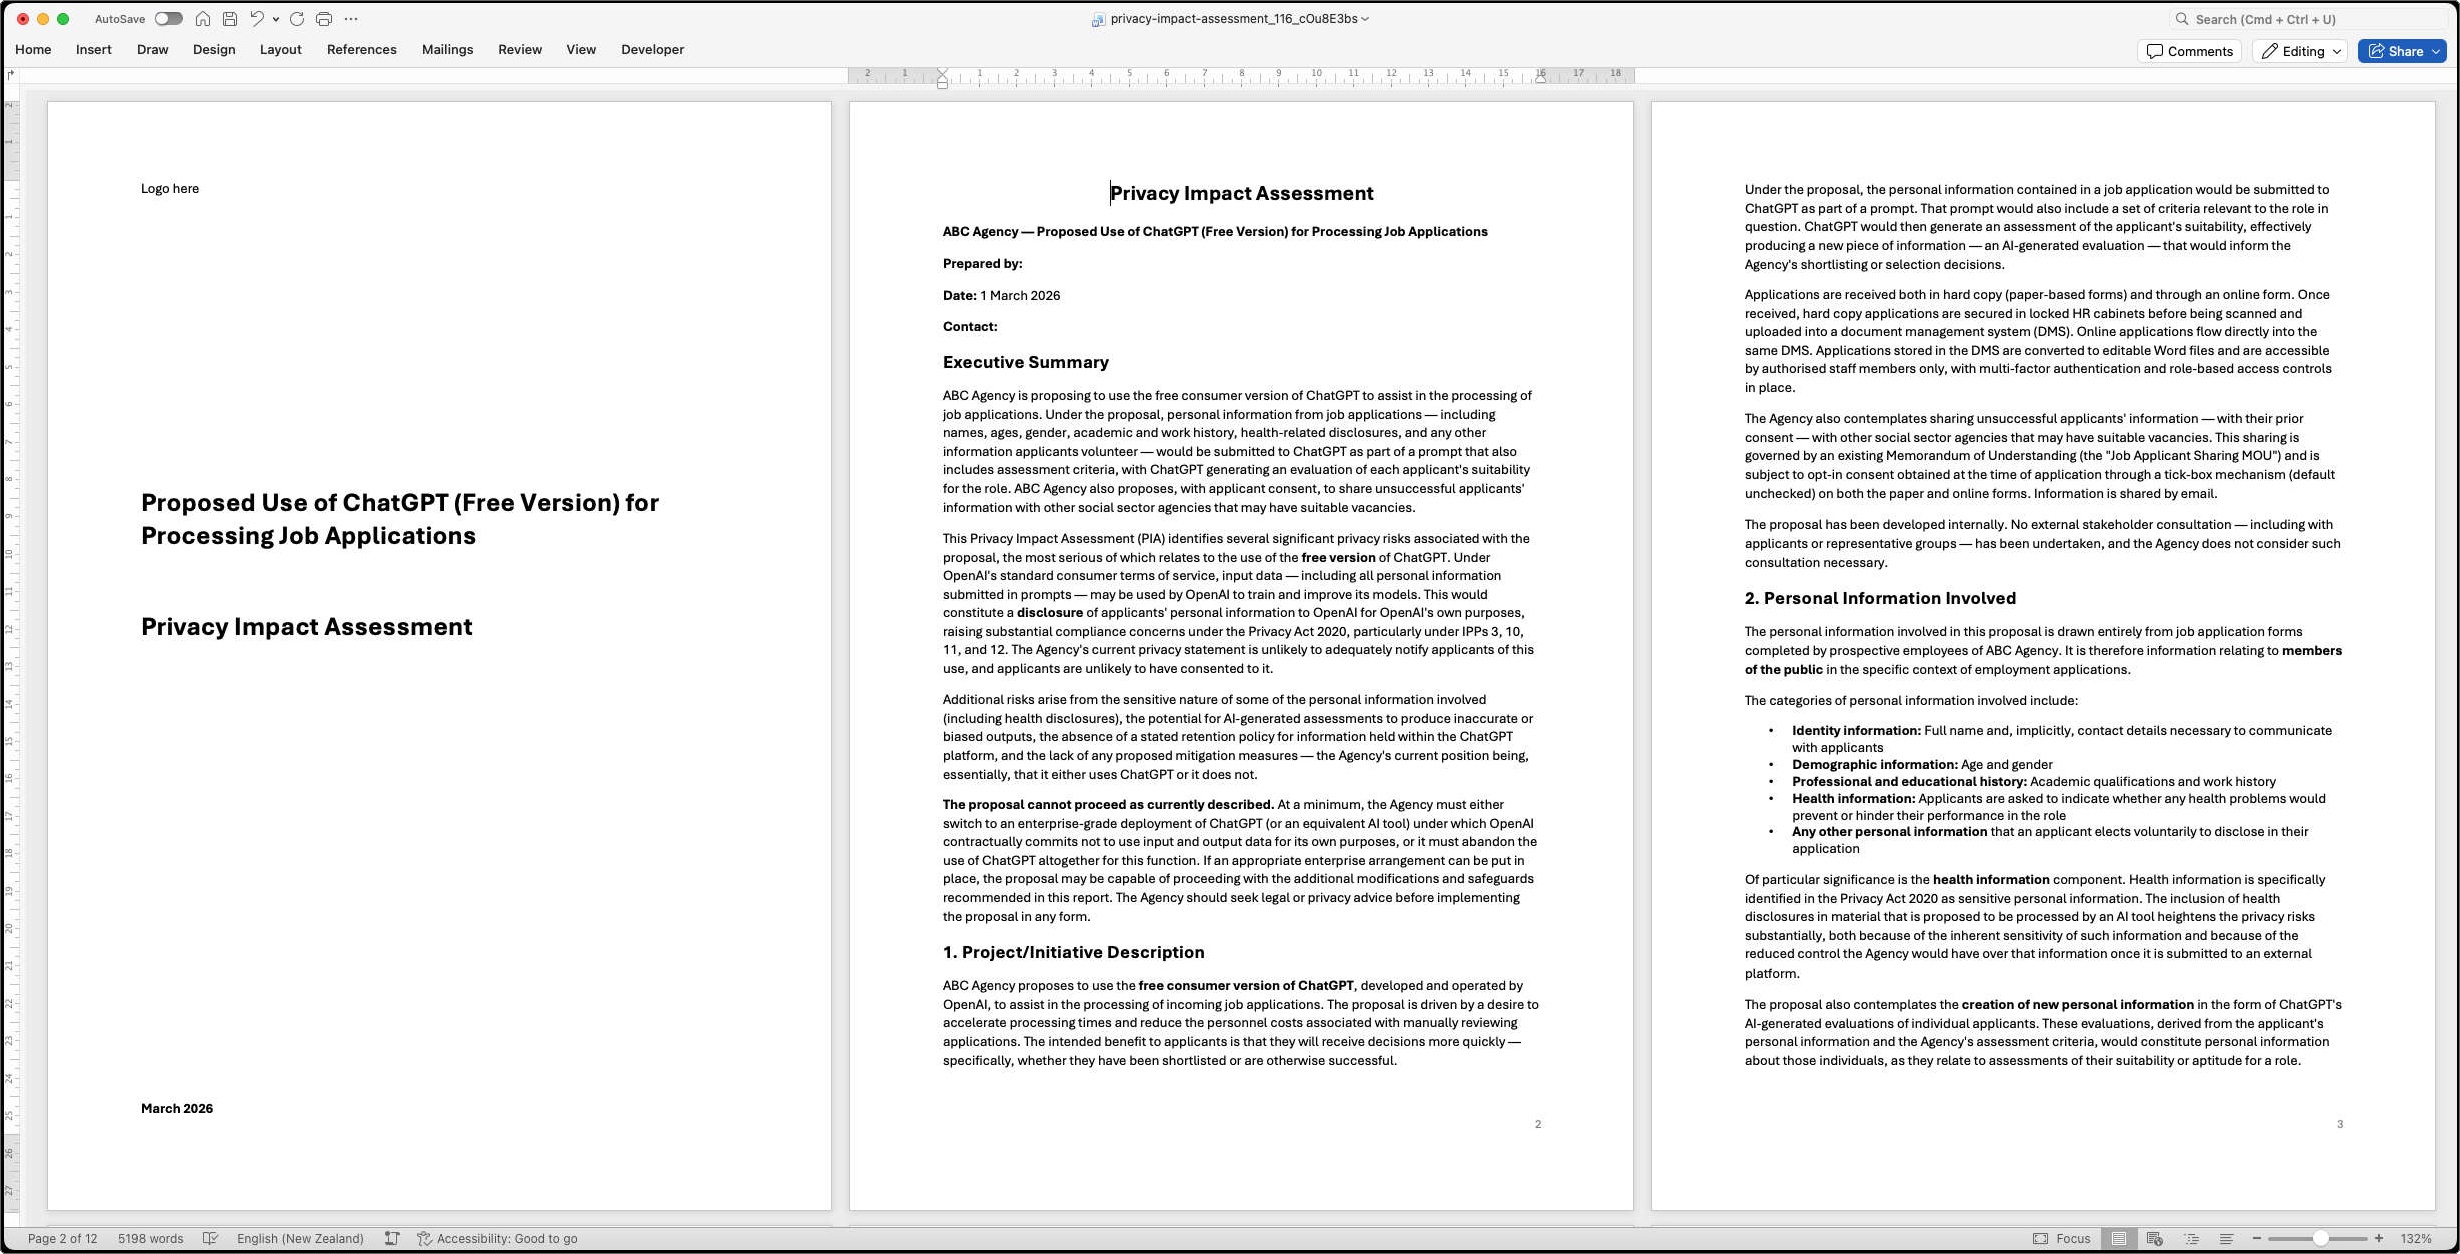
Report Builder generates complete narrative reports from Gravity Forms submissions. Unlike GravityMerge AI’s template-based approach where form data is inserted into a pre-designed document, Report Builder uses Claude to write the report itself — producing flowing, analytical prose from the submitted form data.
How does it differ from GravityMerge AI?
GravityMerge AI uses a template with merge tags, so you control the exact document structure and form data is inserted at specific points. Report Builder gives Claude instructions about the kind of report to produce, and Claude generates the content.
Use GravityMerge AI when you need exact structural control — contracts, letters, policies, and forms. Use Report Builder when you need analytical or narrative output — assessments, risk analyses, advisory reports, compliance reviews, and evaluation summaries.
Report Builder is standalone
Report Builder does not depend on GravityMerge AI. It requires Gravity Forms and an Anthropic API key, but operates independently.
Requirements
- WordPress 6.0 or later
- PHP 8.0 or later
- Gravity Forms installed and active
- An Anthropic API key
Installation and setup
Installing the plugin
Upload the ZIP file through Plugins → Add New → Upload Plugin, then activate it.
Plugin settings
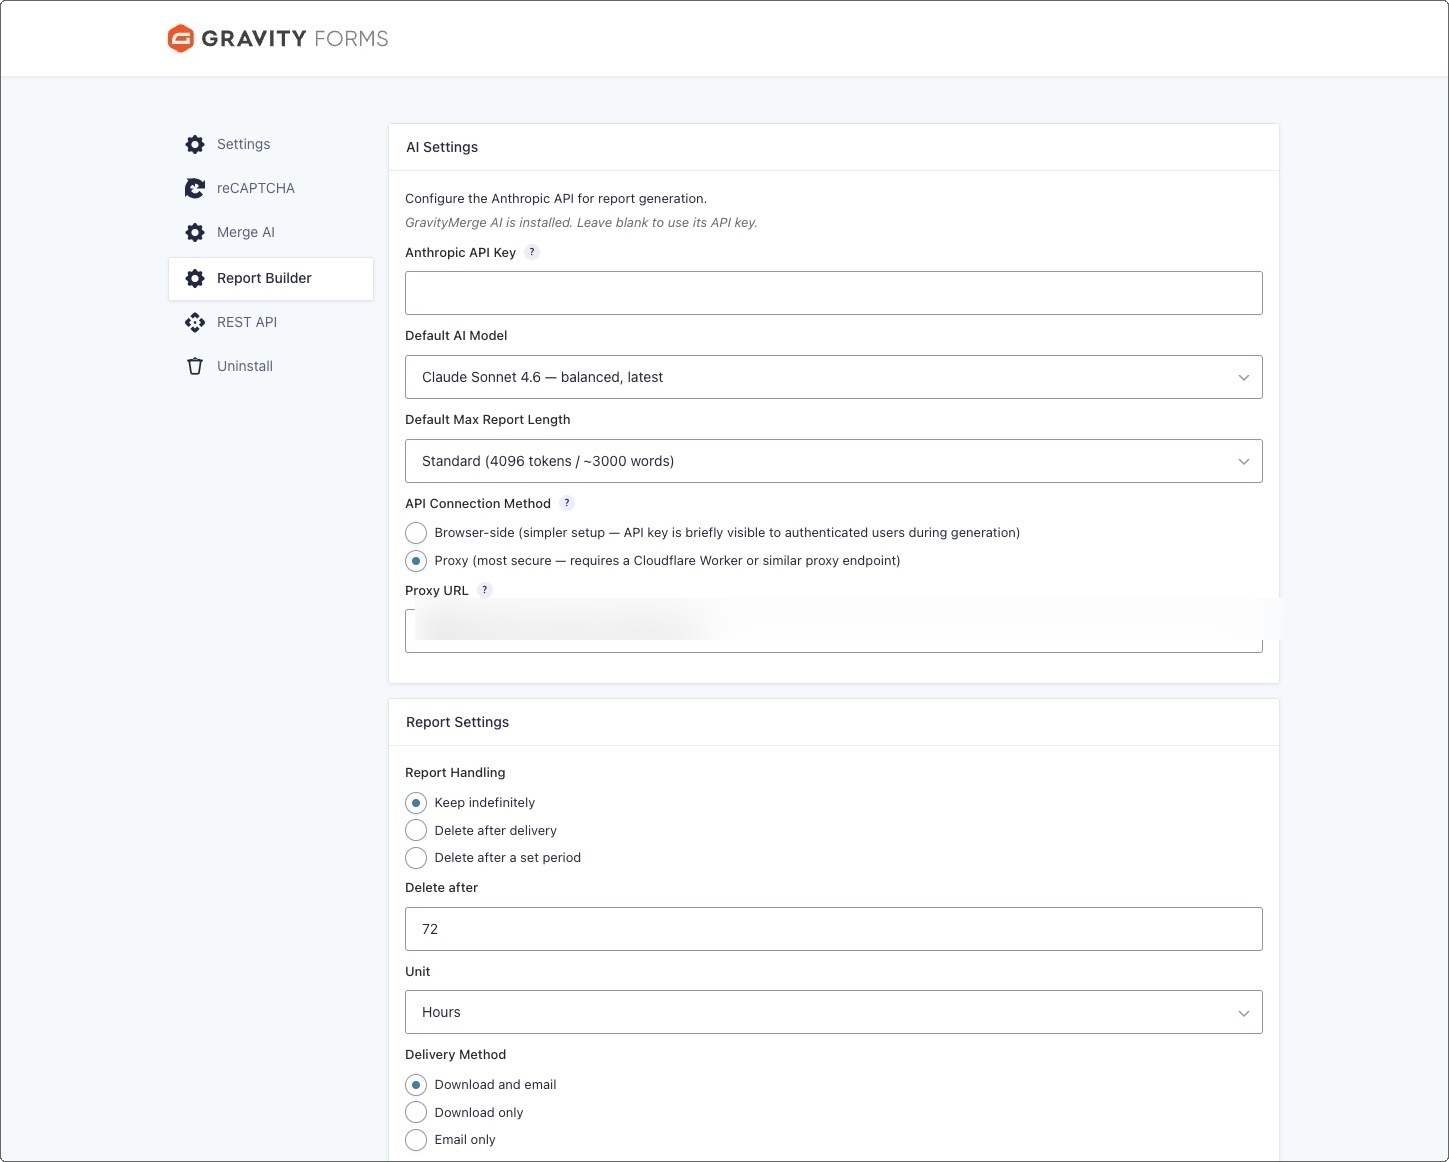
Go to Forms → Settings → Report Builder.
Anthropic API Key — your API key from console.anthropic.com.
Default AI Model — sets the Claude model used for report generation. Can be overridden per report field.
Default Max Report Length — controls the maximum output size. Ranges from short (~750 words) to very long (~12,000+ words). Can be overridden per report field.
API Connection Method — can be set to browser-side or proxy mode. Proxy mode routes API calls through a Cloudflare Worker, keeping your API key off the browser and avoiding hosting timeout limits. Recommended for production use.
Proxy URL — the Cloudflare Worker URL when proxy mode is selected.
Report Handling — controls document retention (keep indefinitely, delete after delivery, or delete after a set period).
Delivery Method — controls whether reports are delivered by download, email, or both.
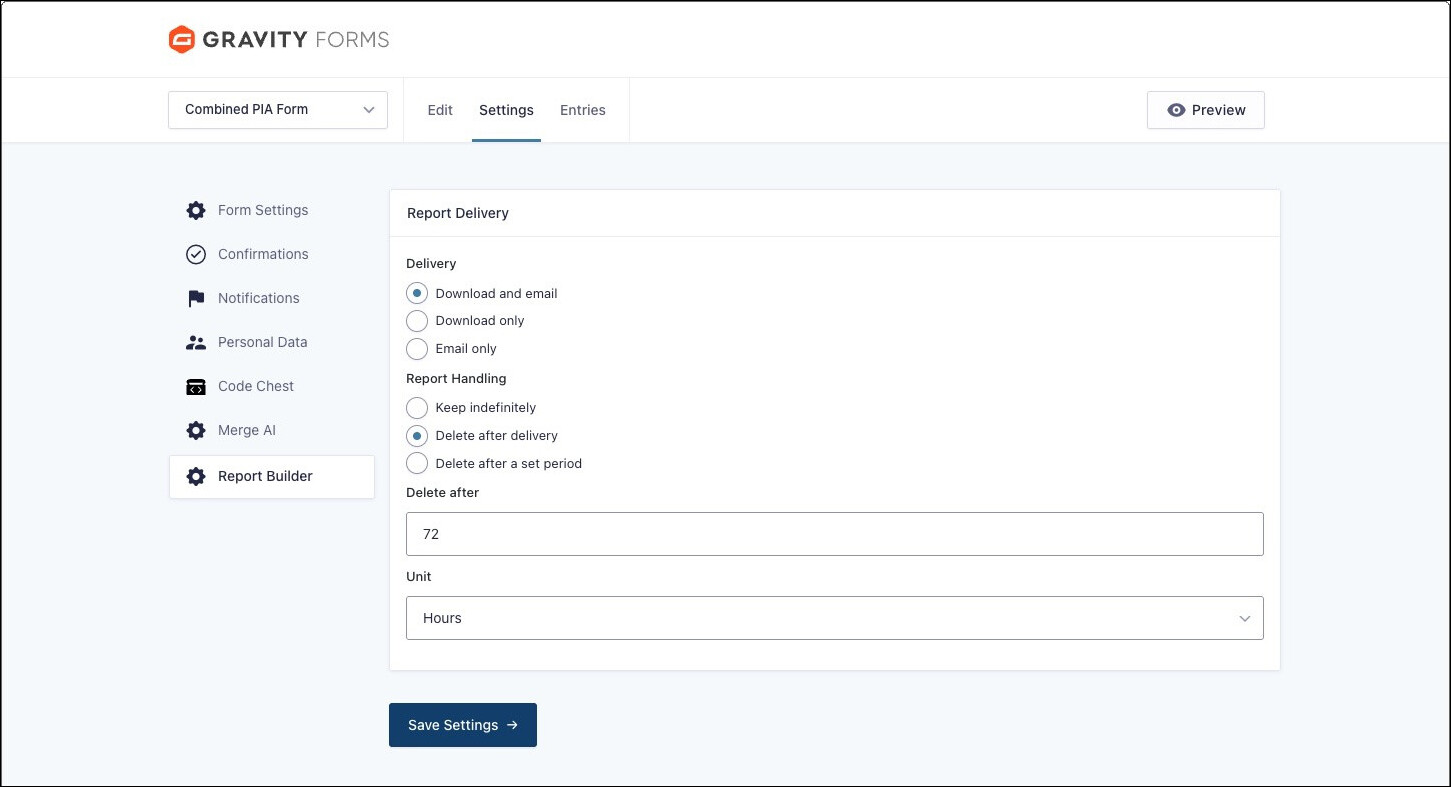
Report delivery settings can also be set at the per-form level, in the specific Form > Settings > Report Builder:
Adding a report field to a form
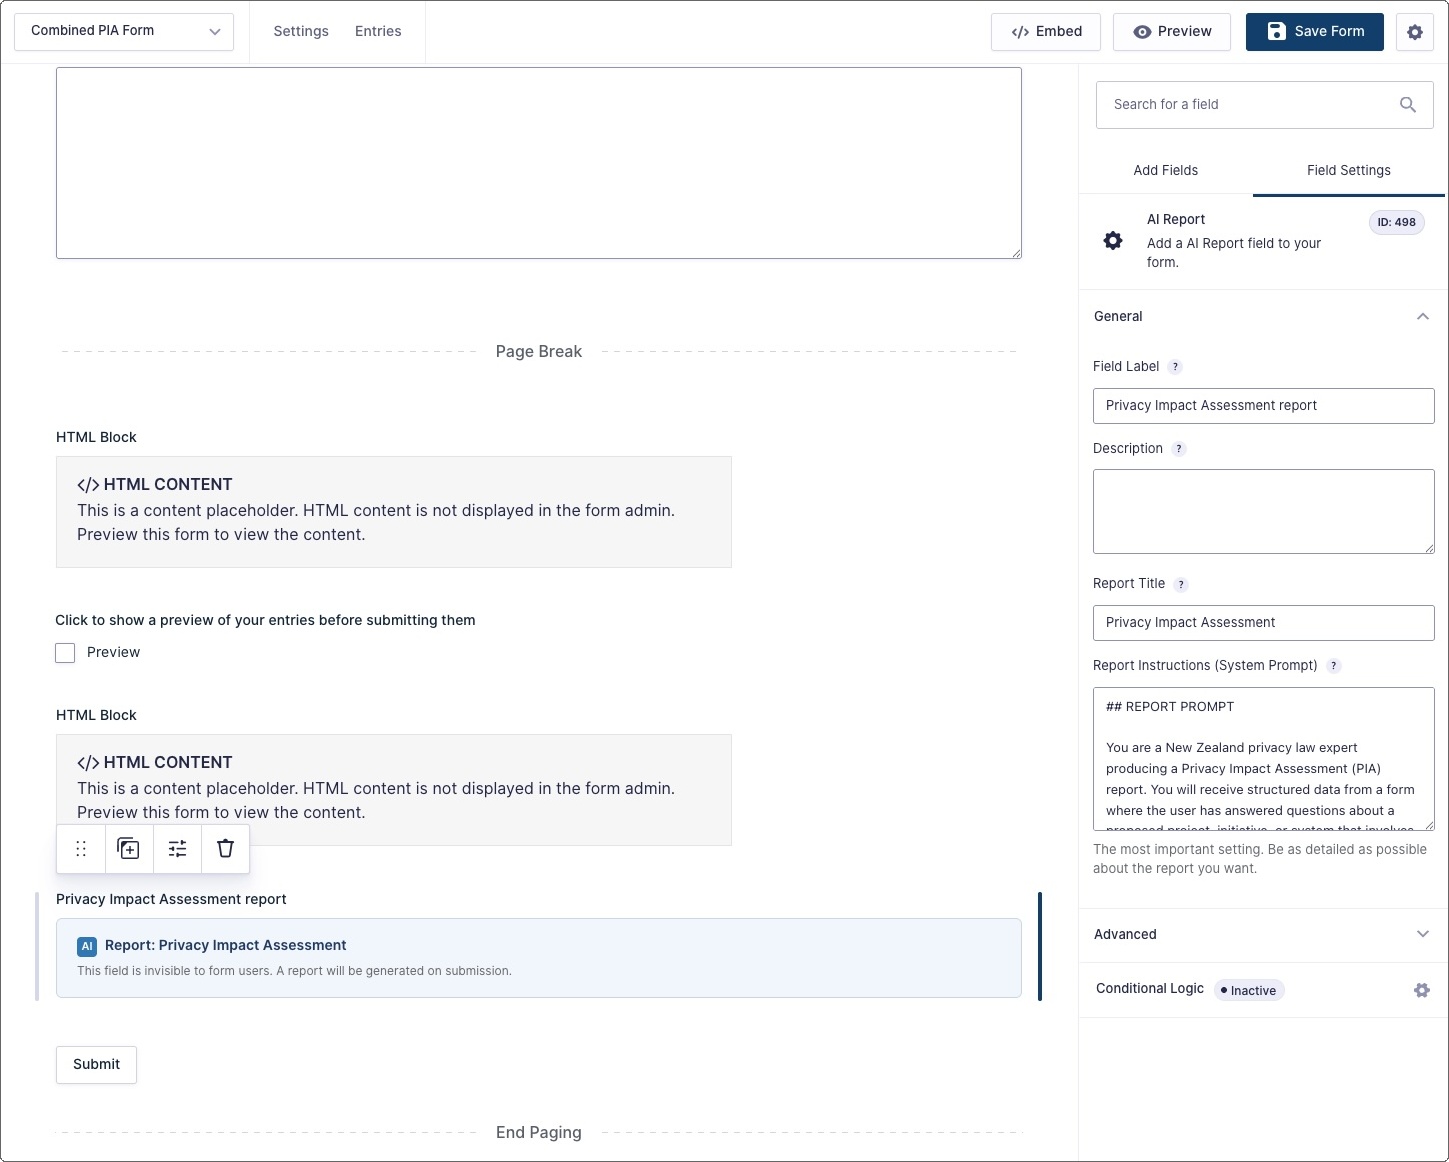
The AI Report field

In the Gravity Forms editor, drag the AI Report field onto your form from the Advanced Fields section. A form can contain multiple AI Report fields — combined with Gravity Forms conditional logic, different form answers can trigger different report configurations.
Standard settings
Report Title — the name shown in the delivery interface and used as the report heading.
Report Instructions (System Prompt) — the key setting that tells Claude what kind of report to generate. This is the single most important factor in report quality. See the section on writing effective instructions below.
Advanced settings
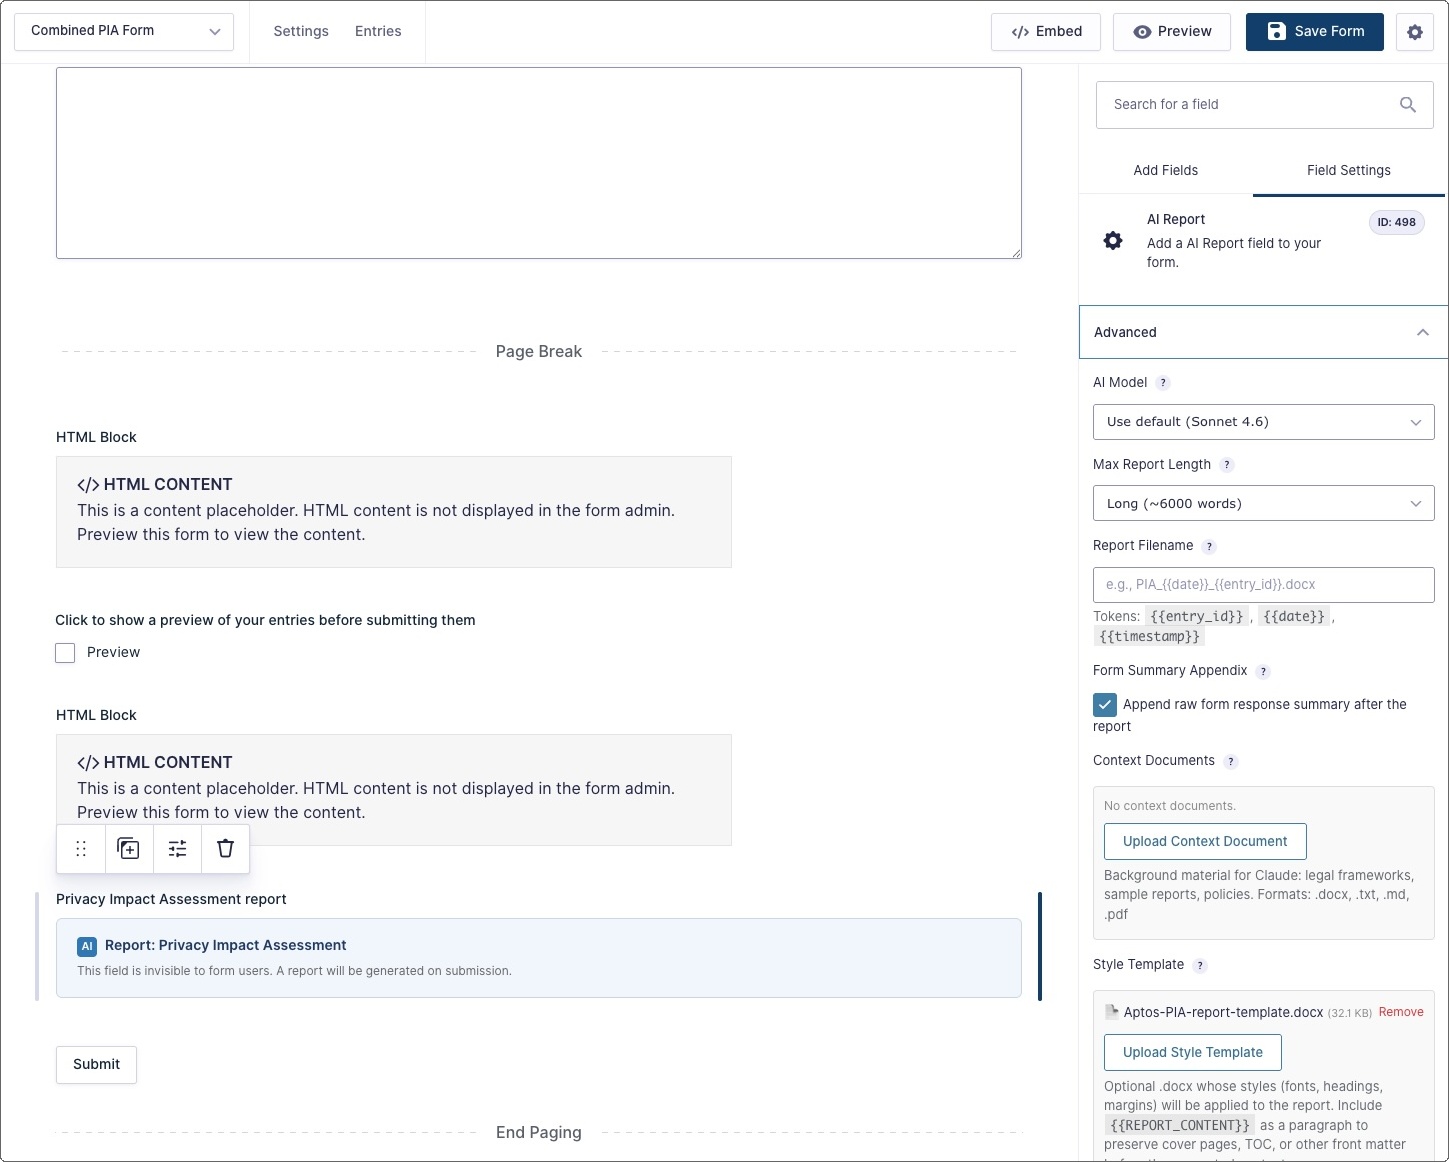
AI Model — override the default model for this specific report field.
Max Report Length — override the default length for this field.
Report Filename — supports tokens such as {{entry_id}}, {{date}}, and {{timestamp}} for dynamic filenames.
Form Summary Appendix — when enabled, appends the raw form responses (Q&A format) after the report as a reference appendix. This appendix is generated directly by the plugin (not by AI) and is always complete.
Context Documents — upload supporting reference material (.docx, .txt, .md, .pdf) such as legislation, policies, regulatory guidance, or sample reports. Claude can draw on these when generating the report.
Style Template — upload a .docx file to apply its styles (fonts, headings, margins) to the generated report. See the section on style templates below.
Writing effective report instructions
The Report Instructions field is the single most important factor in report quality. The more specific your instructions, the more consistent the output.
Be specific about structure
Tell Claude exactly which sections the report must include, in what order, and roughly how detailed each should be.
Specify the framework
Name the legislation, standards, policies, or guidance the report should apply. For example: “Apply the requirements of the Privacy Act 2020 (New Zealand)” or “Use the ISO 27001 risk assessment framework”.
Set the tone and audience
State whether the report should be formal, advisory, plain-language, technical, or tailored to a particular audience. For example: “Write for a non-technical board audience” or “Use formal legal language suitable for regulatory submission”.
Describe how to handle the data
Tell Claude how to treat particular form answers, what to do when fields are left blank, and how to handle unexpected or inconsistent responses.
Set length expectations
Explain how detailed each section should be so the output is proportionate and useful. This works alongside the Max Report Length setting — the instructions shape the content, while the length setting controls the overall word budget.
Using style templates
Style-only template
Upload any .docx file as a style template. The plugin extracts its styles (fonts, heading formats, margins, page layout) and applies them to the generated report. Except as stated below, text content of the uploaded template is ignored.
Template with front matter
For reports that need a cover page, table of contents, document control table, or other front matter:
- Create a
.docxtemplate in Word containing your front matter. - Insert
{{REPORT_CONTENT}}as its own paragraph at the point where the generated report content should appear. - Upload that template as the style template in the report field settings.
Everything before the {{REPORT_CONTENT}} marker is preserved (cover page, contents, branding, etc.), and the AI-generated report is inserted where the marker appears.
Delivery and reports
Setting up the delivery page
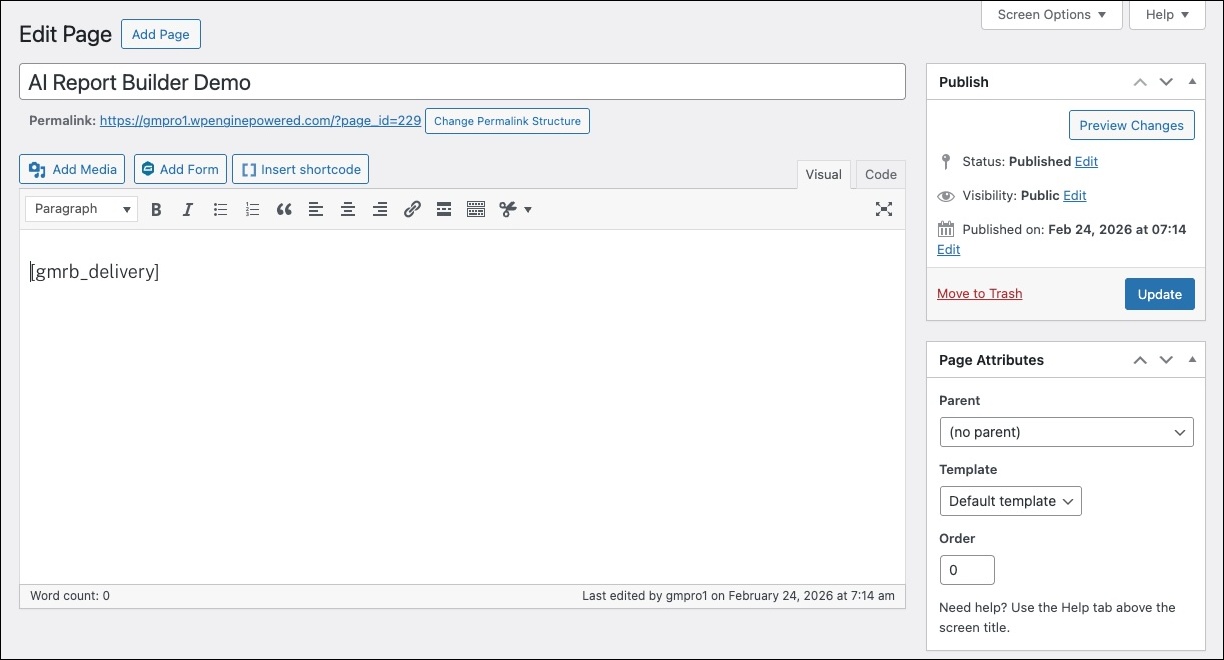
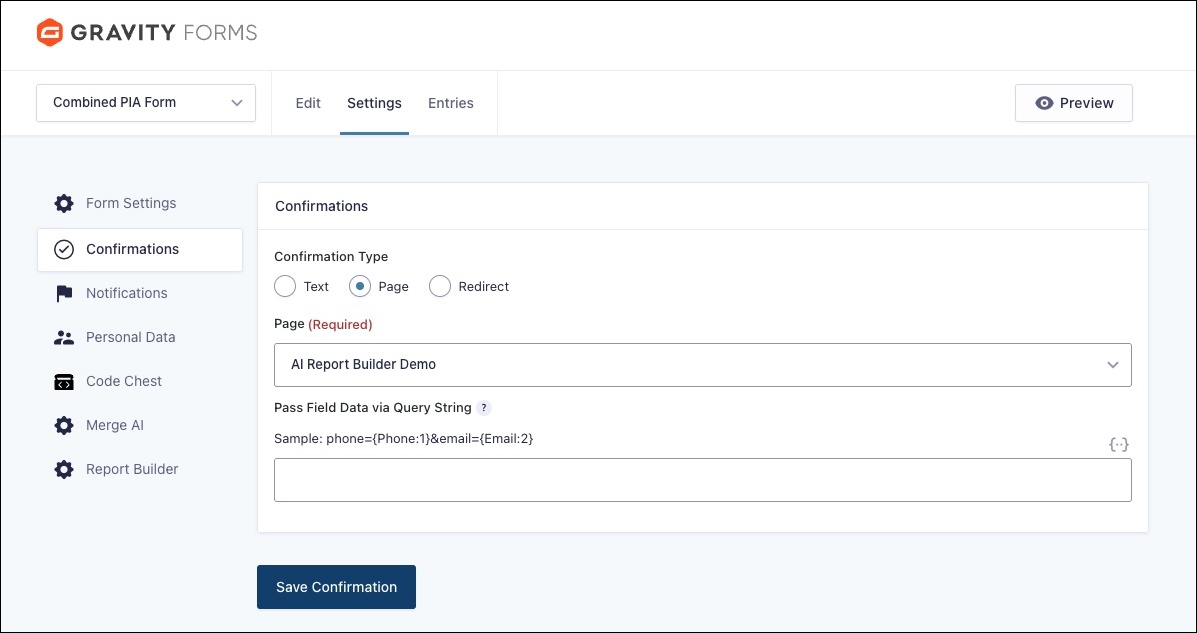
Create a WordPress page containing the shortcode [gmrb_delivery]. Then set your form’s confirmation to redirect users to that page (using the Page confirmation type in Gravity Forms).
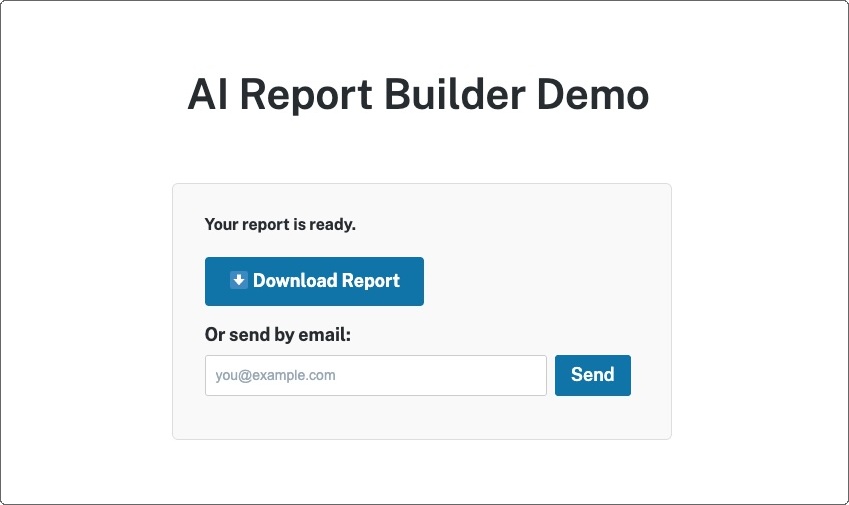
What the user sees
After submission, the user sees a progress indicator while the report is generated. This typically takes 30–90 seconds depending on report length, model choice, and the amount of context provided. Once complete, download and/or email options are shown based on your delivery method setting.
Stored Reports
Go to Forms → Settings → Report Builder → Stored Reports to view, download, and manage generated reports.

Setting up a Cloudflare Worker proxy
The proxy keeps your API key off the browser and helps avoid hosting timeout limits on longer reports. It is recommended for production use. Cloudflare’s free tier is sufficient for most sites.
Create a Cloudflare account
Create a free Cloudflare account at dash.cloudflare.com if you do not already have one.
Create a Worker
- Go to Build → Compute → Workers & Pages.
- Choose Create application, then Create Worker.
- Start with the default template and deploy it.
Add the proxy code
- Open the Worker editor.
- Remove the default code.
- Paste in the Worker code supplied with the plugin (found in the
cloudflare-workerfolder). - Deploy the updated Worker.
Add environment variables
In the Worker’s settings, add:
- ANTHROPIC_API_KEY as a secret — your Anthropic API key
- ALLOWED_ORIGINS as a text variable — your site URL without a trailing slash (e.g.,
https://example.com)
Configure the plugin
In Forms → Settings → Report Builder, set API Connection Method to Proxy, enter the Worker URL, and save.
Testing
Submit a test form entry. The delivery page should show the report generating via the proxy. Check the browser console for any CORS or connection errors.
Browser-side generation
For simpler setups where API key exposure is not a concern — for example, in a trusted, password-protected environment — reports can be generated directly in the browser without a Cloudflare proxy. Set the API Connection Method to “Browser-side” in the plugin settings.
In this mode, the API key is temporarily sent to the browser during report generation. This is less secure than proxy mode but requires no additional infrastructure setup.
Security
File storage
Reports are stored in a non-web-accessible directory and served only through authenticated handlers.
Access tokens
Each form entry has a unique cryptographic token. Download, email, and status endpoints require this token, preventing unauthorised access to reports.
Email rate limiting
Report emails are rate-limited per entry to help prevent abuse.
Troubleshooting
“Failed to fetch” error
Check the browser console (F12 → Console). If the problem is a CORS error, confirm that ALLOWED_ORIGINS in your Cloudflare Worker settings exactly matches your site URL (no trailing slash).
524 timeout
This should not occur with the streaming proxy. If it does, verify that the Worker code was fully replaced with the proxy code supplied by the plugin.
Empty or short report
Increase the Max Report Length setting for the report field and make your Report Instructions more detailed and specific.
Report formatting doesn’t match style template
Ensure the style template is a valid .docx file created in Microsoft Word. Re-upload it if needed. If using front matter with a {{REPORT_CONTENT}} marker, check that the marker is on its own paragraph.
Report generation takes too long
Try a faster model (Haiku for quick reports, Sonnet for balanced performance). Note, however, that Opus does the best job. Reducing the Max Report Length also speeds up generation. If using browser-side mode on a host with short timeout limits, switch to proxy mode.